Tired of generic bedding that doesn’t quite match your unique style? Imagine sinking into a pillowcase crafted precisely to your taste, in a fabric and design you adore. Learning how to sew your own pillowcases for a custom look is a rewarding journey into personalized home decor, offering both cost savings and endless creative possibilities. This guide will walk you through everything you need to transform ordinary fabric into extraordinary pillowcases that perfectly complement your space and enhance your sleep.
The Allure of Custom Pillowcases: Why DIY?
Crafting your own pillowcases goes beyond mere aesthetics; it’s about creating a personalized sanctuary. The primary benefit is personalization, allowing you to choose patterns, colors, and textures that truly reflect your individual style and seamlessly integrate with your existing bedroom decor. You’re no longer limited to mass-produced options that might almost, but not quite, hit the mark.
Beyond style, DIY pillowcases offer significant cost savings. High-quality, unique pillowcases can be surprisingly expensive in stores, but buying fabric in bulk and sewing them yourself can dramatically reduce the expense. This project is also an excellent entry point into the world of sewing, proving incredibly beginner-friendly and offering a sense of accomplishment with each finished piece. It allows you to select durable, comfortable fabrics that stand up to countless washes, ensuring longevity and comfort that store-bought alternatives might lack.
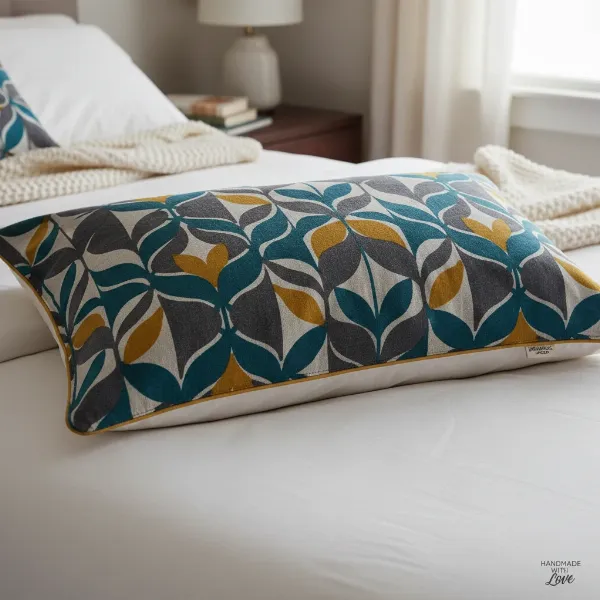 A beautifully decorated bedroom with a custom-sewn pillowcase on the bed.
Essential Tools and Materials for Your Sewing Project
Before you begin stitching, gathering the right tools and materials is crucial for a smooth and successful project. Having everything at hand will make the process much more enjoyable.
Fabric Selection: The Foundation of Your Custom Look
Choosing the right fabric is paramount for both comfort and durability. Consider the following popular options:
- Cotton: A versatile and breathable choice. Quilting cotton is easy to work with and comes in an endless array of patterns. Broadcloth is smooth and durable, while flannel offers warmth and softness, perfect for cooler climates.
- Linen: Known for its natural look, breathability, and increasing softness with each wash. It can wrinkle easily but offers a luxurious feel.
- Silk/Satin: Ideal for a luxurious feel and gentle on hair and skin, reducing friction and frizz. These fabrics can be trickier for beginners to sew due to their slippery nature.
|
Our Picks for the Best Bed pillows in 2026
As an Amazon Associate I earn from qualifying purchases.
|
||
| Num | Product | Action |
|---|---|---|
| 1 | Utopia Bedding Bed Pillows for Sleeping Queen Size (Black), Set of 2, Soft & Fluffy Pillow with Down Alternative Filling, Cooling, Hotel Quality, Gusseted Pillow for Back, Stomach or Side Sleepers |

|
| 2 | Utopia Bedding Bed Pillows for Sleeping Queen Size (Blue), Set of 2, Soft & Fluffy Pillow with Down Alternative Filling, Cooling, Hotel Quality, Gusseted Pillow for Back, Stomach or Side Sleepers |
|
| 3 | Beckham Hotel Collection Bed Pillows Standard/Queen Size Set of 2 - Original Soft Down Alternative Pillow for Sleeping - Soft Support for Back, Stomach or Side Sleepers |
|
| 4 | Amazon Basics Down Alternative Pillows for Stomach and Back Sleepers, Soft Density, Standard, Pack of 2, White, 26 in L x 20 in W |
|
| 5 | Amazon Basics Down-Alternative Pillows for Stomach and Back Sleepers, Soft Density, 20 x 36 inches, 2-Pack, White |
|
| 6 | Amazon Basics Down Alternative Pillow for Back Side Sleepers, Medium Density, Standard Size, 26" x 20", 2-Pack, White |
|
| 7 | Utopia Bedding Bed Pillows for Sleeping Queen Size (Navy/White), Set of 2, Cooling Hotel Quality, Gusseted Pillow for Back, Stomach or Side Sleepers |
|
| 8 | Utopia Bedding Bed Pillows for Sleeping Queen Size (White), Set of 2, Soft & Fluffy Pillow with Down Alternative Filling, Cooling, Hotel Quality, Gusseted Pillow for Back, Stomach or Side Sleepers |
|
| 9 | Utopia Bedding Bed Pillows for Sleeping Queen Size (Grey), Set of 2, Soft & Fluffy Pillow with Down Alternative Filling, Cooling, Hotel Quality, Gusseted Pillow for Back, Stomach or Side Sleepers |
|
| 10 | Goose Feather Down Pillow Queen Size Set of 2, Hotel Collection Bed Pillows for Sleeping, 2 Pack, Down Surrounded Soft Medium Firm Pillows for Side Back Sleepers 20 x 30 in. |
|
When selecting fabric, think about its feel against your skin, its durability for frequent washing, and how well it will complement your room’s aesthetic. For standard pillowcases, you typically need about 1 to 1.5 yards of fabric per pillowcase, depending on the fabric width and pattern direction. Always pre-wash and iron your fabric before cutting to prevent shrinking after your pillowcases are made.
Basic Sewing Supplies: Your Crafting Arsenal
To embark on your pillowcase sewing journey, you’ll need a few fundamental items:
- Sewing Machine: A basic machine with a straight stitch is all you need.
- Matching Thread: Choose a high-quality thread that matches your fabric color for a professional finish.
- Fabric Scissors or Rotary Cutter & Mat: For precise and clean cuts. A rotary cutter is excellent for straight lines.
- Pins or Fabric Clips: To hold fabric layers in place before sewing.
- Iron and Ironing Board: Essential for pressing seams flat and creating crisp edges, which elevates the finished look.
- Measuring Tape or Ruler: For accurate measurements.
- Seam Ripper: An indispensable tool for correcting any stitching mistakes – every sewer has one!
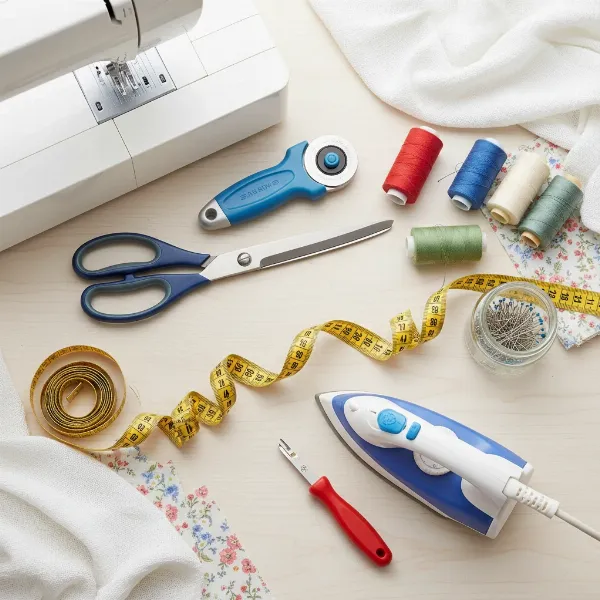 An organized collection of essential sewing tools for a custom pillowcase project.
Understanding Pillowcase Dimensions and Fabric Cuts
Accurate measurements are the key to a perfectly fitting pillowcase. While you can always measure your existing pillow insert, here are common finished dimensions and suggested fabric cuts for popular pillow sizes, including a standard seam allowance.
A standard seam allowance for pillowcases is typically 1/2 inch or 5/8 inch. For simplicity and a clean finish, many tutorials recommend using a 1/2-inch seam allowance.
| Pillow Size | Finished Dimensions (W x L) | Fabric Cut (Approximate) | Notes |
|---|---|---|---|
| Standard | 20 x 26 inches | Two pieces: 21 x 30 inches | Add 1 inch to width (for two 1/2-inch seam allowances) and 4 inches to length (for opening hem and two 1/2-inch seam allowances). Some patterns cut shorter if an accent cuff is added. |
| Queen | 20 x 30 inches | Two pieces: 21 x 34 inches | Similar width allowance, more length for the pillow. |
| King | 20 x 36 inches | Two pieces: 21 x 40 inches | The length adjustment is significant for these larger pillows. |
| For a single piece of fabric (cut on fold): Measure the pillow width + 1 inch, and double the length + 4 inches. Fold the fabric in half along the length, so the fold becomes one of your long edges, eliminating one seam. |
These measurements include a 1/2-inch seam allowance on all sides and sufficient length for a simple hem at the opening. If you plan to add a cuff or special closure, these measurements may need slight adjustment.
Step-by-Step Guide: Sewing a Simple Custom Pillowcase
This basic method is excellent for beginners and yields a neat, durable pillowcase.
Prepare Your Fabric
Start by pre-washing your fabric according to its care instructions. This step is crucial as it preshrinks the fabric, preventing your finished pillowcase from shrinking unevenly after its first wash. Once dry, iron the fabric thoroughly to remove any wrinkles or creases, ensuring accurate cutting and straight stitching.
Cut Your Fabric
Using the measurements from the table above, or your own custom dimensions, carefully cut two identical rectangular pieces of fabric. For instance, for a standard pillowcase with a 20×26 inch finished size, you would cut two pieces, each 21 inches wide by 30 inches long. Ensure your cuts are straight and precise, as this impacts the final look.
Create the Opening/Hem
This method creates a simple, neat opening. On one of the longer edges of each fabric piece, fold the raw edge over by 1/2 inch towards the wrong side of the fabric and press. Then, fold it over again by 2.5 to 3 inches and press firmly. This creates a clean double-hemmed edge. Stitch this hem in place along the inner fold, close to the edge. This will be the finished opening of your pillowcase. Some refer to this as a “faux cuff.”
Pin and Sew the Sides
Place your two fabric pieces right sides together, aligning all raw edges. The “right sides” are the printed or “pretty” sides of your fabric, facing inwards. Pin along the three raw edges (the two long sides and one short side), leaving the hemmed opening unpinned. Ensure your hemmed edges line up perfectly.
Using your sewing machine, stitch along these three pinned edges with your chosen seam allowance (e.g., 1/2 inch). Start and end each seam with a backstitch to secure the stitches and prevent unraveling. Remove pins as you sew.
Finish Seams (Optional but Recommended)
To prevent fraying and give your pillowcase a professional, durable finish, consider finishing your seams.
- Zigzag Stitch: Use a zigzag stitch along the raw edges of your sewn seams.
- Serged Seams: If you have a serger, this offers the cleanest finish.
- French Seams: (See advanced techniques below for more detail) This technique encloses the raw edges within the seam itself, creating a very neat interior.
Clip Corners and Turn Right Side Out
Carefully clip the corners of your pillowcase diagonally, close to the stitching but without cutting through it. This reduces bulk and helps create crisp, sharp corners when turned right side out. Now, turn the pillowcase right side out, gently pushing out the corners with your fingers or a point turner tool.
Final Press
Give your newly sewn pillowcase a final press with an iron. This sets the seams, removes any remaining wrinkles, and gives your custom pillowcase a crisp, professional appearance ready for use.
Elevate Your Pillowcases: Advanced Techniques for a Custom Look
Once you’ve mastered the basic pillowcase, you can explore techniques that add sophistication and enhanced functionality.
French Seams
French seams are a hallmark of high-quality sewing, renowned for neatly enclosing all raw edges, resulting in a clean interior with no fraying. This technique is particularly beneficial for delicate fabrics or items that will be washed frequently.
To create French seams:
- Place fabric wrong sides together and sew with a small seam allowance (e.g., 1/4 inch).
- Trim the seam allowance closely.
- Press the seam flat.
- Turn the fabric so right sides are together, enclosing the previous seam. Press again.
- Sew with a larger seam allowance (e.g., 1/2 inch), ensuring the first seam is fully encased. This results in a durable, beautiful finish.
Envelope Closure
An envelope closure eliminates the need for zippers or buttons and keeps your pillow insert securely tucked away and out of sight. It creates an overlapping flap at the back of the pillowcase.
To create an envelope closure:
- Instead of two identical pieces, you’ll typically cut one front piece and two back pieces that overlap significantly in the middle (e.g., one piece for the front and two pieces for the back that are roughly 2/3 and 2/3 of the front piece’s length, allowing for overlap).
- Hem one long edge of each back piece.
- Place the front piece right side up, then lay the two back pieces right side down on top, overlapping them in the center, with their raw edges aligned with the front piece’s raw edges.
- Pin and sew around all four edges. When turned right side out, the overlapping back panels form a neat opening.
Adding Embellishments
Personalize your pillowcases further with decorative touches:
- Piping: Inserted into the seams for a tailored edge.
- Trim: Lace, ribbon, or decorative braids can be sewn along the opening or outer edges.
- Embroidery or Appliqué: Add monograms, patterns, or fabric shapes for a truly unique design.
- Contrast Cuffs: Use a different fabric for the cuff at the opening for a pop of color or pattern.
Care and Maintenance for Your Handmade Pillowcases
Proper care will extend the life and beauty of your custom pillowcases. Always consider the specific care instructions for the fabric you used.
- Washing: Most cotton pillowcases can be machine washed in cold or warm water with like colors. Delicate fabrics like silk should be hand-washed or machine-washed on a gentle cycle in a mesh laundry bag. Avoid harsh detergents that can degrade fabric fibers.
- Drying: Tumble dry on low heat or hang to air dry. High heat can cause shrinkage and wear out fibers faster, especially for cotton.
- Ironing: If needed, iron your pillowcases while slightly damp on the appropriate heat setting for your fabric. This helps to smooth out wrinkles and maintain a crisp look.
- Storage: Store pillowcases in a cool, dry place. Folding them neatly helps prevent wrinkles and keeps your linen closet organized.
Troubleshooting Common Pillowcase Sewing Issues
Even experienced sewers encounter hiccups. Here are some common issues and quick fixes:
- Uneven Seams: This often happens when the fabric isn’t fed evenly through the machine or when pins are not used adequately. Practice sewing straight lines on scrap fabric. Use more pins to hold layers securely.
- Corners Not Crisp: If your corners look rounded, ensure you clipped the corner fabric close enough to the seam (without cutting it) before turning the pillowcase right side out. Use a point turner or the blunt end of scissors to gently push out the corners from the inside.
- Fabric Fraying: Finishing your seams with a zigzag stitch, serger, or French seams is the best way to prevent fraying and make your pillowcases more durable.
Conclusion
Sewing your own pillowcases for a custom look is a deeply satisfying project that allows you to infuse your personality into your living space. From selecting the perfect fabric to mastering various finishing techniques, each step offers an opportunity for creative expression. Not only will you enjoy the comfort and style of bedding tailored exactly to your preferences, but you’ll also gain valuable sewing skills and the pride of knowing you created something beautiful with your own hands. So, why not grab some fabric, fire up your sewing machine, and start creating the custom pillowcases of your dreams? What unique fabric or embellishment are you excited to try first?
Frequently Asked Questions
What is the best fabric for pillowcases?
The best fabric depends on personal preference for comfort and durability. Cotton, especially quilting cotton or broadcloth, is highly recommended for its breathability, ease of sewing, and washability. Flannel provides warmth, while silk or satin offer a luxurious feel and benefits for hair and skin.
How much fabric do I need for a standard pillowcase?
For a single standard pillowcase (20×26 inches finished size), you generally need about 1 to 1.5 yards of fabric, depending on the fabric width and if you are cutting on the fold or two separate pieces. Always check specific tutorial measurements and consider fabric pattern direction.
Can a beginner sew pillowcases?
Absolutely! Pillowcases are considered an excellent project for beginner sewers. They primarily involve sewing straight lines and offer a practical way to learn basic sewing machine operation, cutting, pinning, and seam finishing techniques with immediate, satisfying results.
What is a French seam?
A French seam is a method of sewing that encloses the raw edges of the fabric within the seam itself, resulting in a very neat, strong, and professional finish that prevents fraying. It’s achieved by sewing the fabric wrong sides together first, trimming, and then sewing right sides together to encase the initial seam.
How do I make an envelope pillowcase?
An envelope pillowcase features an overlapping back opening, similar to an envelope, which conceals the pillow insert without requiring zippers or buttons. You typically cut a front piece and two overlapping back pieces. The back pieces are hemmed on their overlapping edges, then layered and sewn to the front piece around the perimeter.